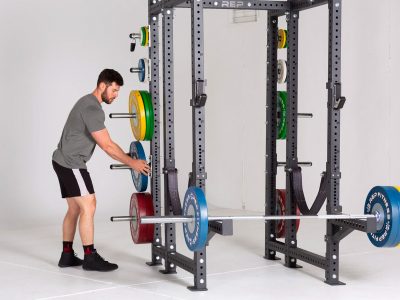
|
The Glide Kip
It seems that in recent years many of the younger gymnasts are actually
performing a swing to a kip, which is a long hang kip, rather than a glide kip.
It is seen at most lower level meets, a coach setting up a spring board so their
gymnast can get the best swing possible for their kip. Many of these gymnasts
may not be performing the skill as required in their routines.
The difference is that with the glide kip the gymnast must hold their legs up in
front of them, whether together or straddled, throughout the hang or glide phase
of the skill. With the long hang kip, the gymnast keeps her legs down and hips
open until the leg-lift portion of the kip. One is a swing and the other is a
glide.
Years ago coaches would explain a glide very differently than it has been
explained in recent days. Back then, we asked the gymnast to “jump up and
immediately pike” before they caught the bar with their hands. Many coaches
even spotted the jump portion in order to teach their gymnast to lift their hips
high enough to get the best momentum at the onset of the glide. We asked our
gymnasts to hold the "L" or pike until they completely extended their
hips at the end of the glide. Coaches really spent a great deal of time teaching
the glide portion of the glide kip. Yes, we can all agree the low bar was
actually low back then and there was not enough room for the gymnast to swing
rather than glide.
Here are a few thoughts to help your gymnast with this skill.
The muscles involved in lifting the leg in front of the body for the glide
portion of the glide kip is the hip flexor. The hip flexors are very small when
you look at them on an anatomy chart, but they have a big job. This one little
muscle must lift the gymnast’s very long limb. As the gymnast’s leg grows,
gets longer and heavier, there is more stress put on that little muscle, the hip
flexor.
The coach must condition their gymnasts hip flexor muscles constantly because
many children are growing rapidly. If the hip flexors are not conditioned
properly or consistently other areas of the body must then attempt to perform
the task of lifting and holding the leg up, which can lead to injury.
With that thought in mind, let us go back to the glide for a glide kip because
it is one of the few skills where a gymnast must hold her legs up for a
considerable amount of time. Besides asking your gymnast to perform one glide at
a time, as in the glide kip you may want to add a few simple drills involving
the glide, such as multiple glides consecutively or octagon glides.
To teach the Glide and Toes to Bar Drill, instruct your gymnast to stand
slightly further than arms distance from the low bar. Once in place, instruct
your gymnast to jump, immediately lift their toes forward and tuck their
buttocks under while in the air. They must immediately grasp the bar, holding a
hollow and slightly piked position. Once their hands are on the bar, your
gymnast must glide forward, keeping their feet off the mat and reaching an
extended position. It may be easier for the gymnast if you remind them they must
see their feet throughout the glide. Once they are extended, instruct your
gymnast to bring their feet\ankles to the bar and hold them there, even when
their body swings\falls (due to gravity) to the hanging position. Holding their
feet up is not easy; your gymnast may need help with this drill. Once mastered,
you may want to ask your gymnast to perform multiple glides before the leg lift
portion of the glide kip.
Another very useful glide drill is the Octagon Glide, Extend, and Lift Drill. It
involves the use an octagon to teach our gymnasts how to glide with their legs
in front of their body rather than below their body. This drill should also help
teach the gymnast to extend their hips completely at the end of the glide and
perform the leg lift from that extended position.
Here is how you would use an octagon for the glide, extend, and leg lift drill.
Have your gymnast grasp the bar securely. Place an octagon approximately one
foot from the bar, so that your gymnast can see it. Once your gymnast is holding
the bar securely, ask them to place their heels\feet on an octagon. Next,
instruct your gymnast to hold a hollow and\or slightly piked position keeping
their buttocks under. Once your gymnast is in the beginning position of the
drill, a relaxed hang with their heels on the octagon, have them glide forward,
literally rolling the octagon forward with their calves and then return to the
starting position. Once they have mastered rolling the octagon with the back of
their legs, ask your gymnast to perform three glides consecutively. Your gymnast
must reach an extended position during each complete glide. When your gymnast is
completely extended for the third time, instruct them to quickly bring their
toes\ankles to bar and hold them on the bar even when their body swings\falls
(due to gravity) to the hanging position (as if they just did a leg-lift) The
octagon often rolls away when the leg lift occurs. (Be sure to remind your
gymnast to hold on tight and be ready to spot if necessary.)
And one more note regarding the glide portion of the kip. If you ask your
gymnast to think of throwing the bar back as soon as their shoulders and hips
are directly underneath the bar, they may be able to glide more efficiently for
their kip. The action of throwing the bar back should increase their momentum
and extension of the glide, therefore, making the kip portion easier.
The few drills explained here should help your gymnast learn to completely
extend their hips and shoulders prior to the leg-lift portion of the glide kip.
Once they have mastered the leg-lift from the completely extended position, your
gymnast may perhaps be on their way to performing beautiful and efficient Glide
Kips!
Remember, it is imperative that your gymnast perform these drills with the
correct form and technique in order to learn the skills correctly, condition
their muscles correctly, and prevent habits of form breaks or incorrect
technique.
Karen Goeller
www.gymcoach.sport.new.net/
To see more books by Karen Goeller - go here.
|